Let’s say that we have a SolrCloud cluster using Solr 4.X. Now we want to upgrade our Solr cluster and to have a modern Solr version as Solr 6.X, how can we do it ?
Well, there are many ways to do it. The cleanest is to install directly the new version of Solr, to adapt the configuration files and to reindex all data. But in production, it is often not acceptable to do that.
In this tutorial, we will upgrade in two steps : from Solr 4 to Solr 5 and then from Solr 5 to Solr 6. It is not possible to upgrade directly from Solr 4 to Solr 6 i.e. between 2 major versions because the index format changes and Solr can only read an index format from the parent major Solr version.
Before upgrading directly the cluster, it is recommended to do the upgrade in a development server. In order to test quickly if all the configuration files are fully compatible with the next Solr version, you can just have a mono server and examine the Solr log files to see what changes you need to do. So by testing incrementally you can list all the required changes of the Solr configuration files and do it in a better way on your SolrCloud cluster.
We only mentioned the Solr configuration files but you also need to check all your custom code (update processors, search components etc…) and also the custom libs that you may have added to your Solr cluster.
Generally speaking, it is recommended to read and understand all the changes that occurred between major Solr versions :https://cwiki.apache.org/confluence/display/solr/Major+Changes+from+Solr+4+to+Solr+5, the CHANGES.txt file : http://lucene.apache.org/solr/6_6_0/changes/Changes.html.
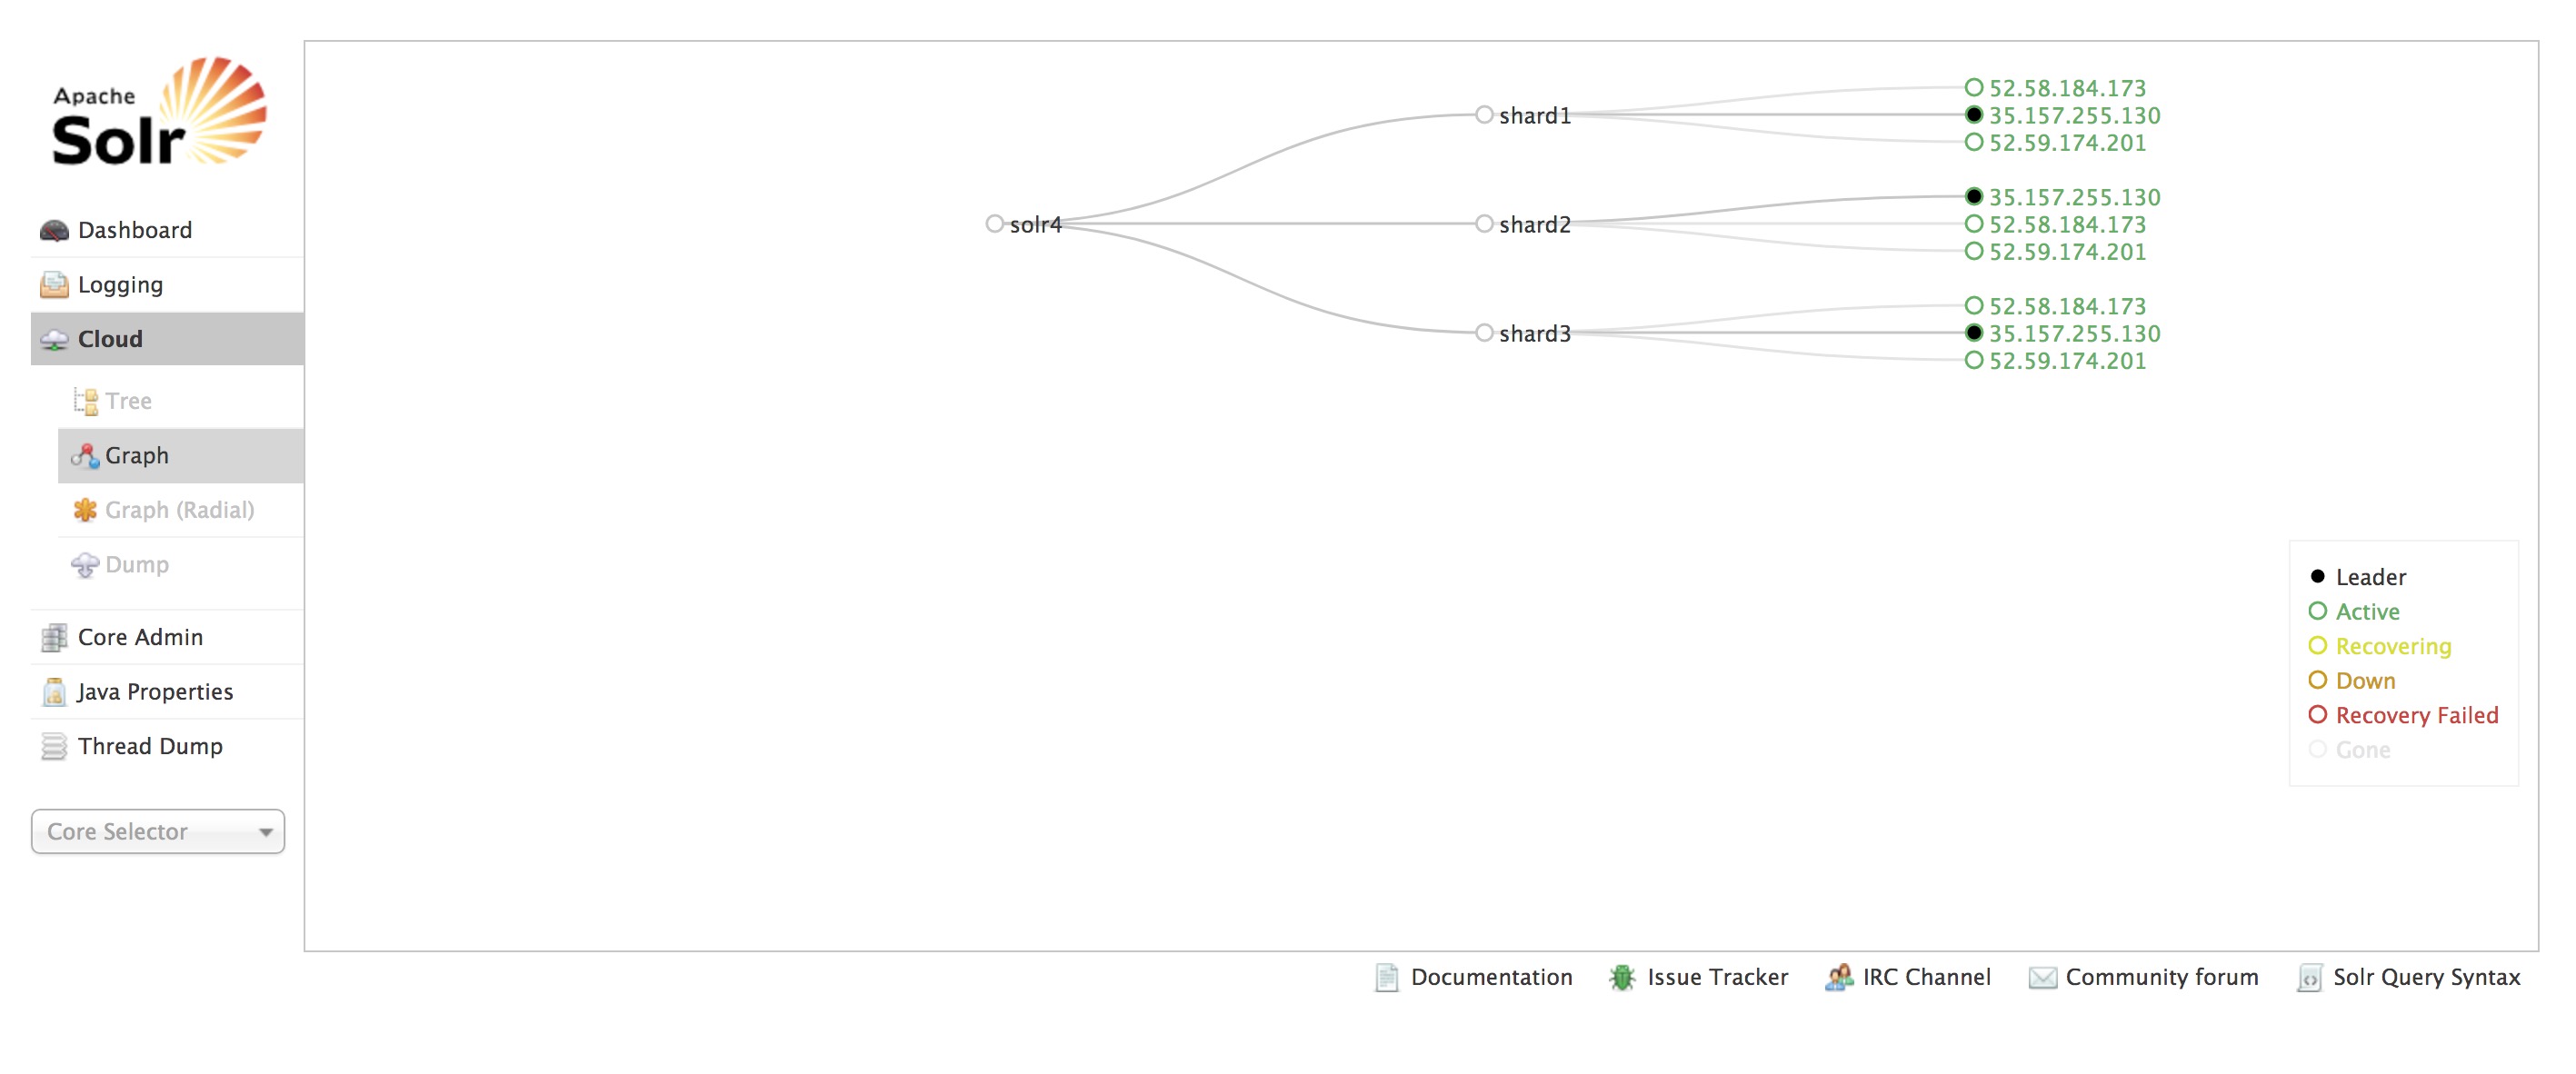
So for this tutorial we suppose that we have a cluster of 3 SolrCloud servers in Solr 4.10.4 with of course data on our index and we want to upgrade the cluster in order to have a Solr 6 version on it.
To simulate this, we installed Solr 4.10.4 on 3 EC2 instances (t2.medium) on Debian 8 (Jessie). We have also a Zookeeper ensemble on these 3 servers.
So this is the SolrCloud cluster that we have :
3 shards per server, total : 9 shards with a replication factor at 3.
We installed Solr 4 in /opt/solr4 and the Solr home is located in /var/solr/data. The Solr configuration files that we used are in the default collection1 folder located in /opt/solr4/example/solr/collection1/conf.
The name of the collection is solr4
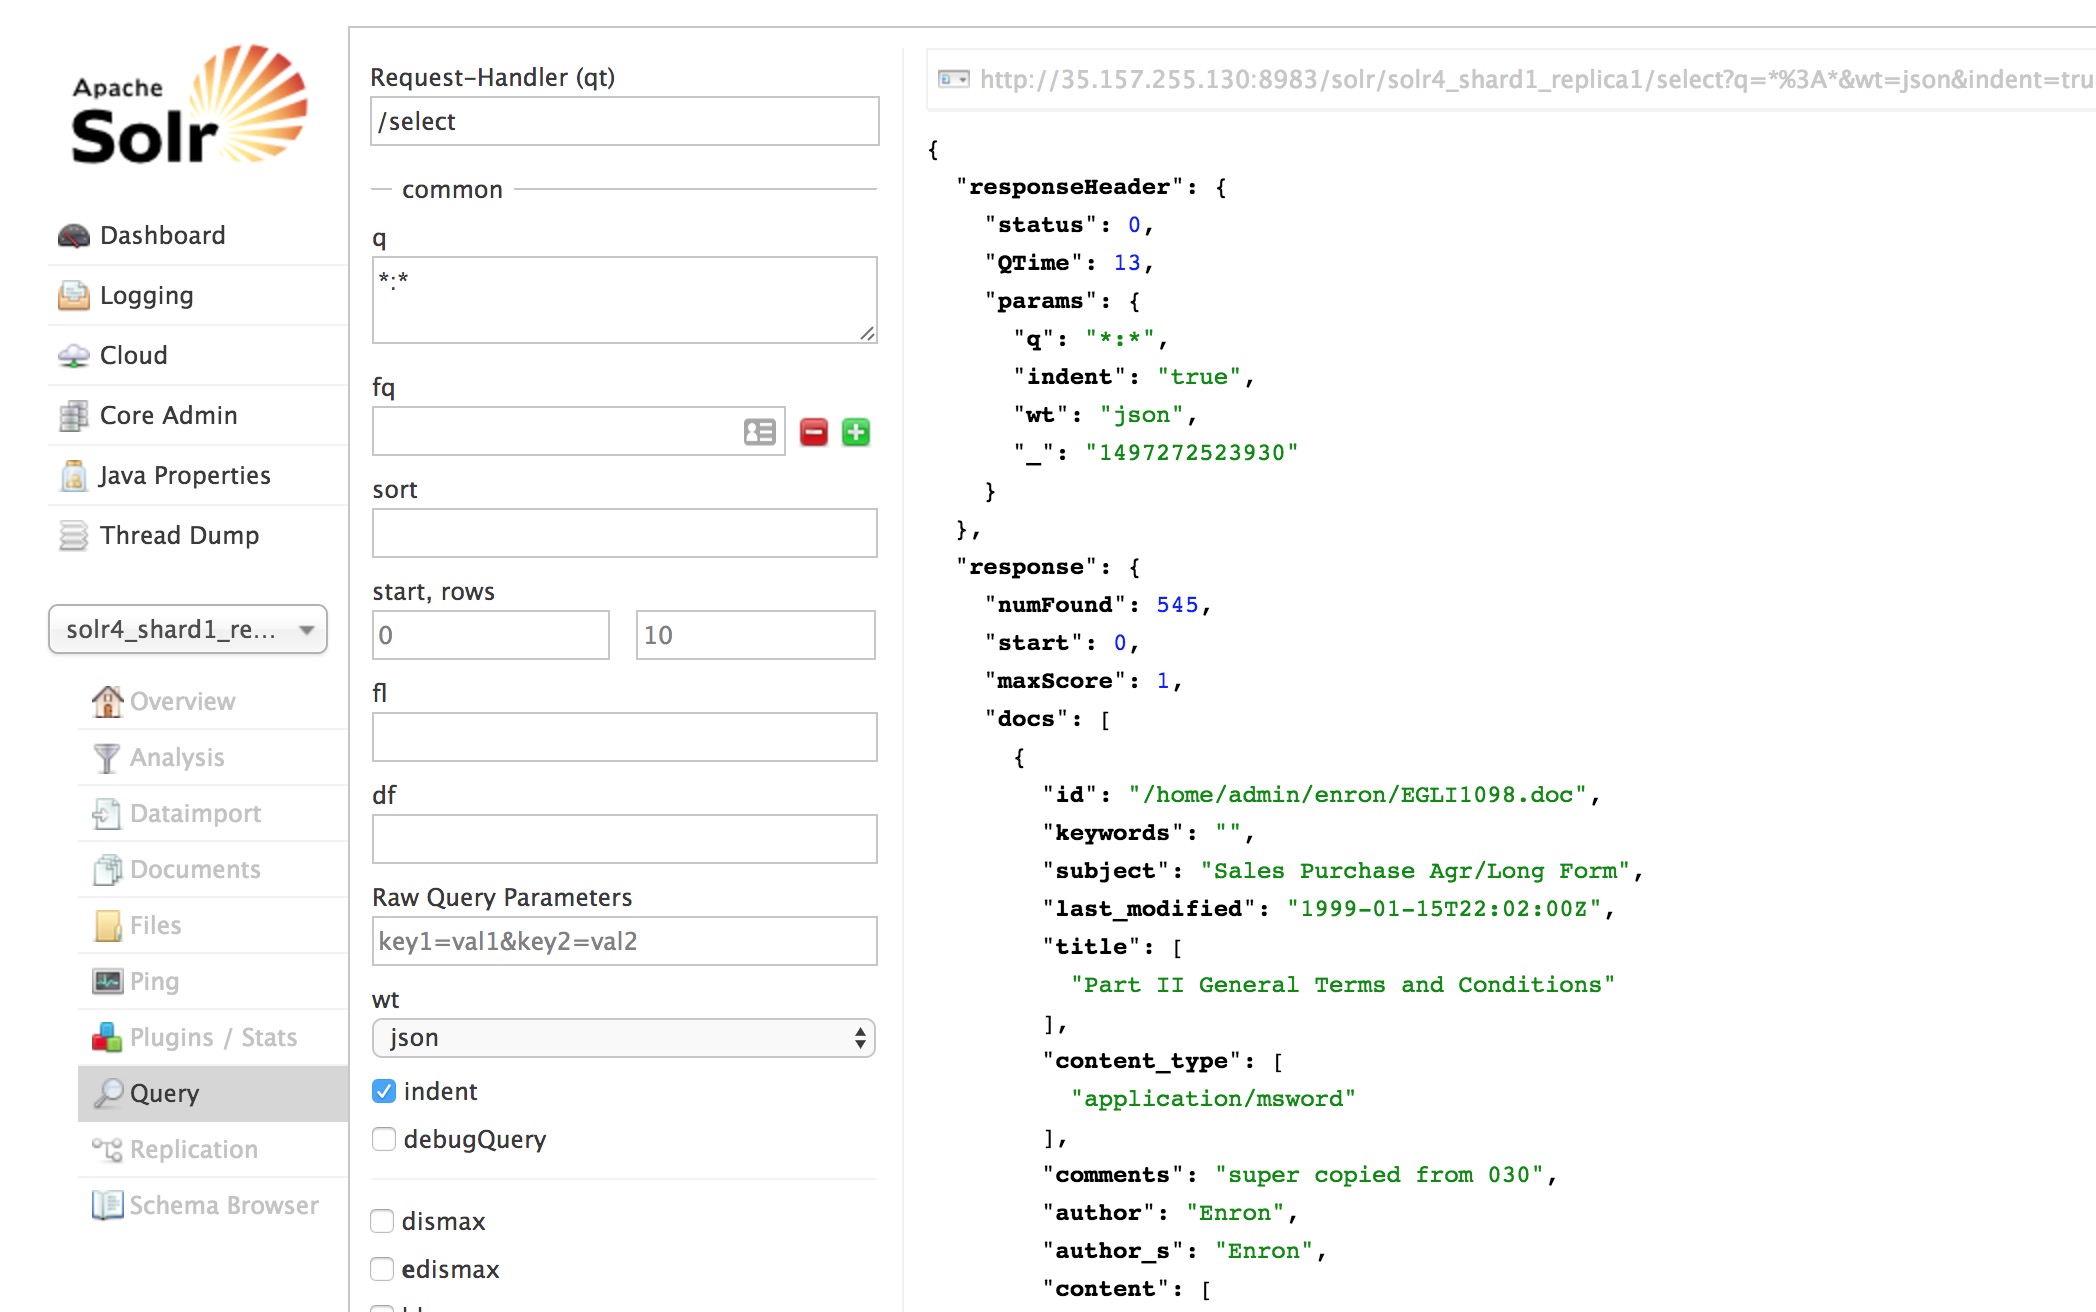
 We want to add some data to have some documents in our index.
To do this, we use some files from the Enron dataset : https://www.cs.cmu.edu/~./enron/
Finally we did a little bash script to post the files with Solr Cell :
#!/bin/bash -e
#
#
# Send some files to Solr
#
#
SAVEIFS=$IFS
IFS=$(echo -en "\n\b")

for file in /home/admin/enron/*
do
 if [[ -f $file ]]; then
 #copy stuff ....
 echo $file
 NEW_UUID=$(cat /dev/urandom | tr -dc 'a-zA-Z0-9' | fold -w 32 | head -n 1)
 java -Durl=http://localhost:8983/solr/solr4/update/extract?literal.id=$NEW_UUID -jar post.jar $file
fi
done
IFS=$SAVEIFS
So we have 545 docs in our Solr index. It is not a lot of data but it will be far enough for this tutorial.
Let’s begin to upgrade our Solr !
1.Upgrade to Solr 5
A.Optimize operation (optional)
OK so the first step is to optimize our index before upgrading the cluster to Solr 5. You have to do this if you already upgraded in the past your Solr cluster ie if you were on Solr 3.6 for example and you already upgraded to Solr 4.x.
Why doing this ? It is to be sure that your index is fully in the Solr 4 format version and does not contain any parts of the previous Solr index format version.
So to do that, simply enter the optimize command on any server :
http://35.157.255.130:8983/solr/solr4/update?optimize=true
If you do this with a large index, be patient, the operation can be very long.
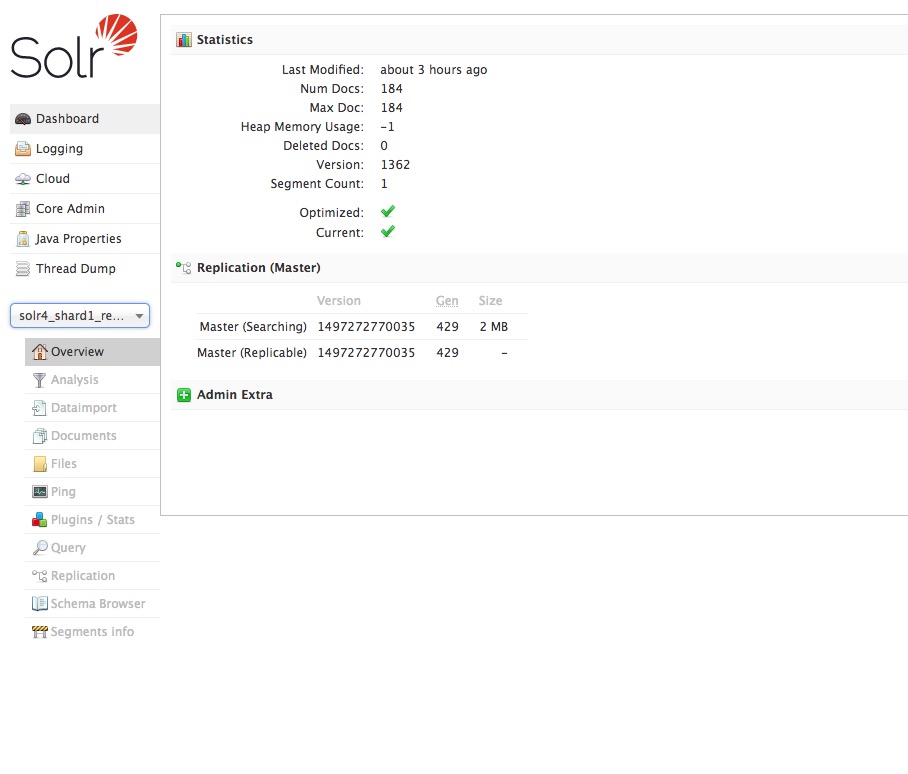
At the end, you can check directly in the admin UI if the operation is done for each shard :
Now, we have to check the schema.xml and solrconfig.xml files
B. Do the requires changes into configuration files
For this step, we assumed that you checked in a development server what changes you needed to do on your configuration files to be compliant with Solr 5.
In this tutorial, we do the following changes :
– In solrconfig.xml :
— Remove the line related to admin handler section :
<requestHandler name="/admin/" class="solr.admin.AdminHandlers" />
— Remove the line relative to integrityCheck :
<checkIntegrityAtMerge>false</checkIntegrityAtMerge>
– In schema.xml :
— Replace the units parameter by distanceUnits for geospatial fields :
<fieldType name="location_rpt" class="solr.SpatialRecursivePrefixTreeFieldType"
 geo="true" distErrPct="0.025" maxDistErr="0.000009" distanceUnits="degrees" />
<fieldType name="bbox" class="solr.BBoxField"
 geo="true" distanceUnits="degrees" numberType="_bbox_coord" />
C. Send the modified configuration to ZK and reload the collection
We modified the schema and solrconfig files at the same place than before in /opt/solr4/example/solr/collection1/conf.
Go to /opt/solr4/example/scripts/cloud-scripts and send the modified configuration to ZK :
cd /opt/solr4/example/scripts/cloud-scripts
bash zkcli.sh -zkhost ec2-35-157-255-130.eu-central-1.compute.amazonaws.com:2181,ec2-52-58-184-173.eu-central-1.compute.amazonaws.com:2181,ec2-52-59-174-201.eu-central-1.compute.amazonaws.com:2181 -cmd upconfig -confdir /opt/solr4/example/solr/collection1/conf -confname confsolr4
We assume that the ZK configuration was named confsolr4.
Then reload the collection :
http://35.157.255.130:8983/solr/admin/collections?action=RELOAD&name=solr4
We can now install Solr 5 on each server one by one. We will finish by the overseer.
It means that we stop one server, then we upgrade Solr and we start Solr on this server with the new Solr version. The cluster is still functional with “old” and “new” Solr on it.
We do not stop Zookeeper ensemble during this operation.
So we begin by the server 35.157.255.130.
We stop Solr 4 on it :
cd /opt/solr4/bin
./solr stop -p 8983
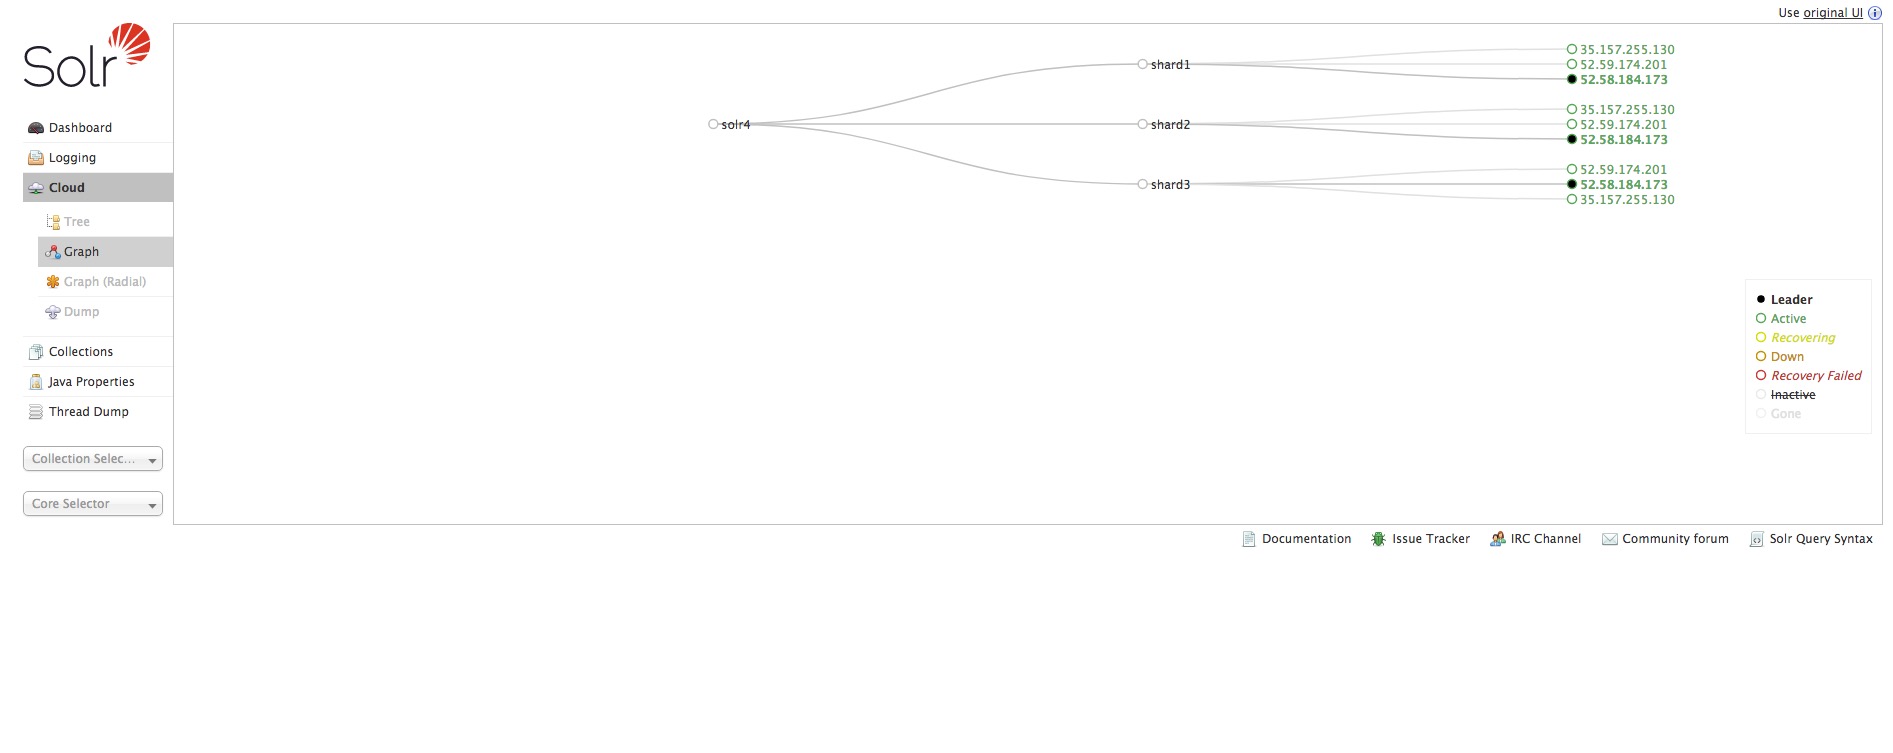
You can check on the Solr UI that the leader of each shard is well present on the other two servers.
After that we need to get Solr 5 from the official site and then install it with the production installation script. I will not detail how to install it because we already covered it in a blog entry here : https://www.francelabs.com/blog/tutorial-solrcloud-5-amazon-ec2/
After Solr 5 is installed the most important is to fill correctly the variables in etc/default/solr/solr.in.sh corresponding to your SolrCloud cluster parameters : ZK_HOST, SOLR_HOST, SOLR_PORT and SOLR_HOME.
In our case :
ZK_HOST="ec2-35-157-255-130.eu-central-1.compute.amazonaws.com:2181,ec2-52-58-184-173.eu-central-1.compute.amazonaws.com:2181,ec2-52-59-174-201.eu-central-1.compute.amazonaws.com:2181,ec2-52-59-174-201.eu-central-1.compute.amazonaws.com:2181
SOLR_HOME=/var/solr/data
Important : the folder for the Solr home MUST be the same that you used in Solr 4 i.e. it contains your different core folders and your indexes for each of them.
SOLR_HOST="35.157.255.130"
It is the public IP of the server. It has to be filled.
After you did this, you can finally launch your Solr server, for that we use directly the service provided with Solr 5 :
service solr start
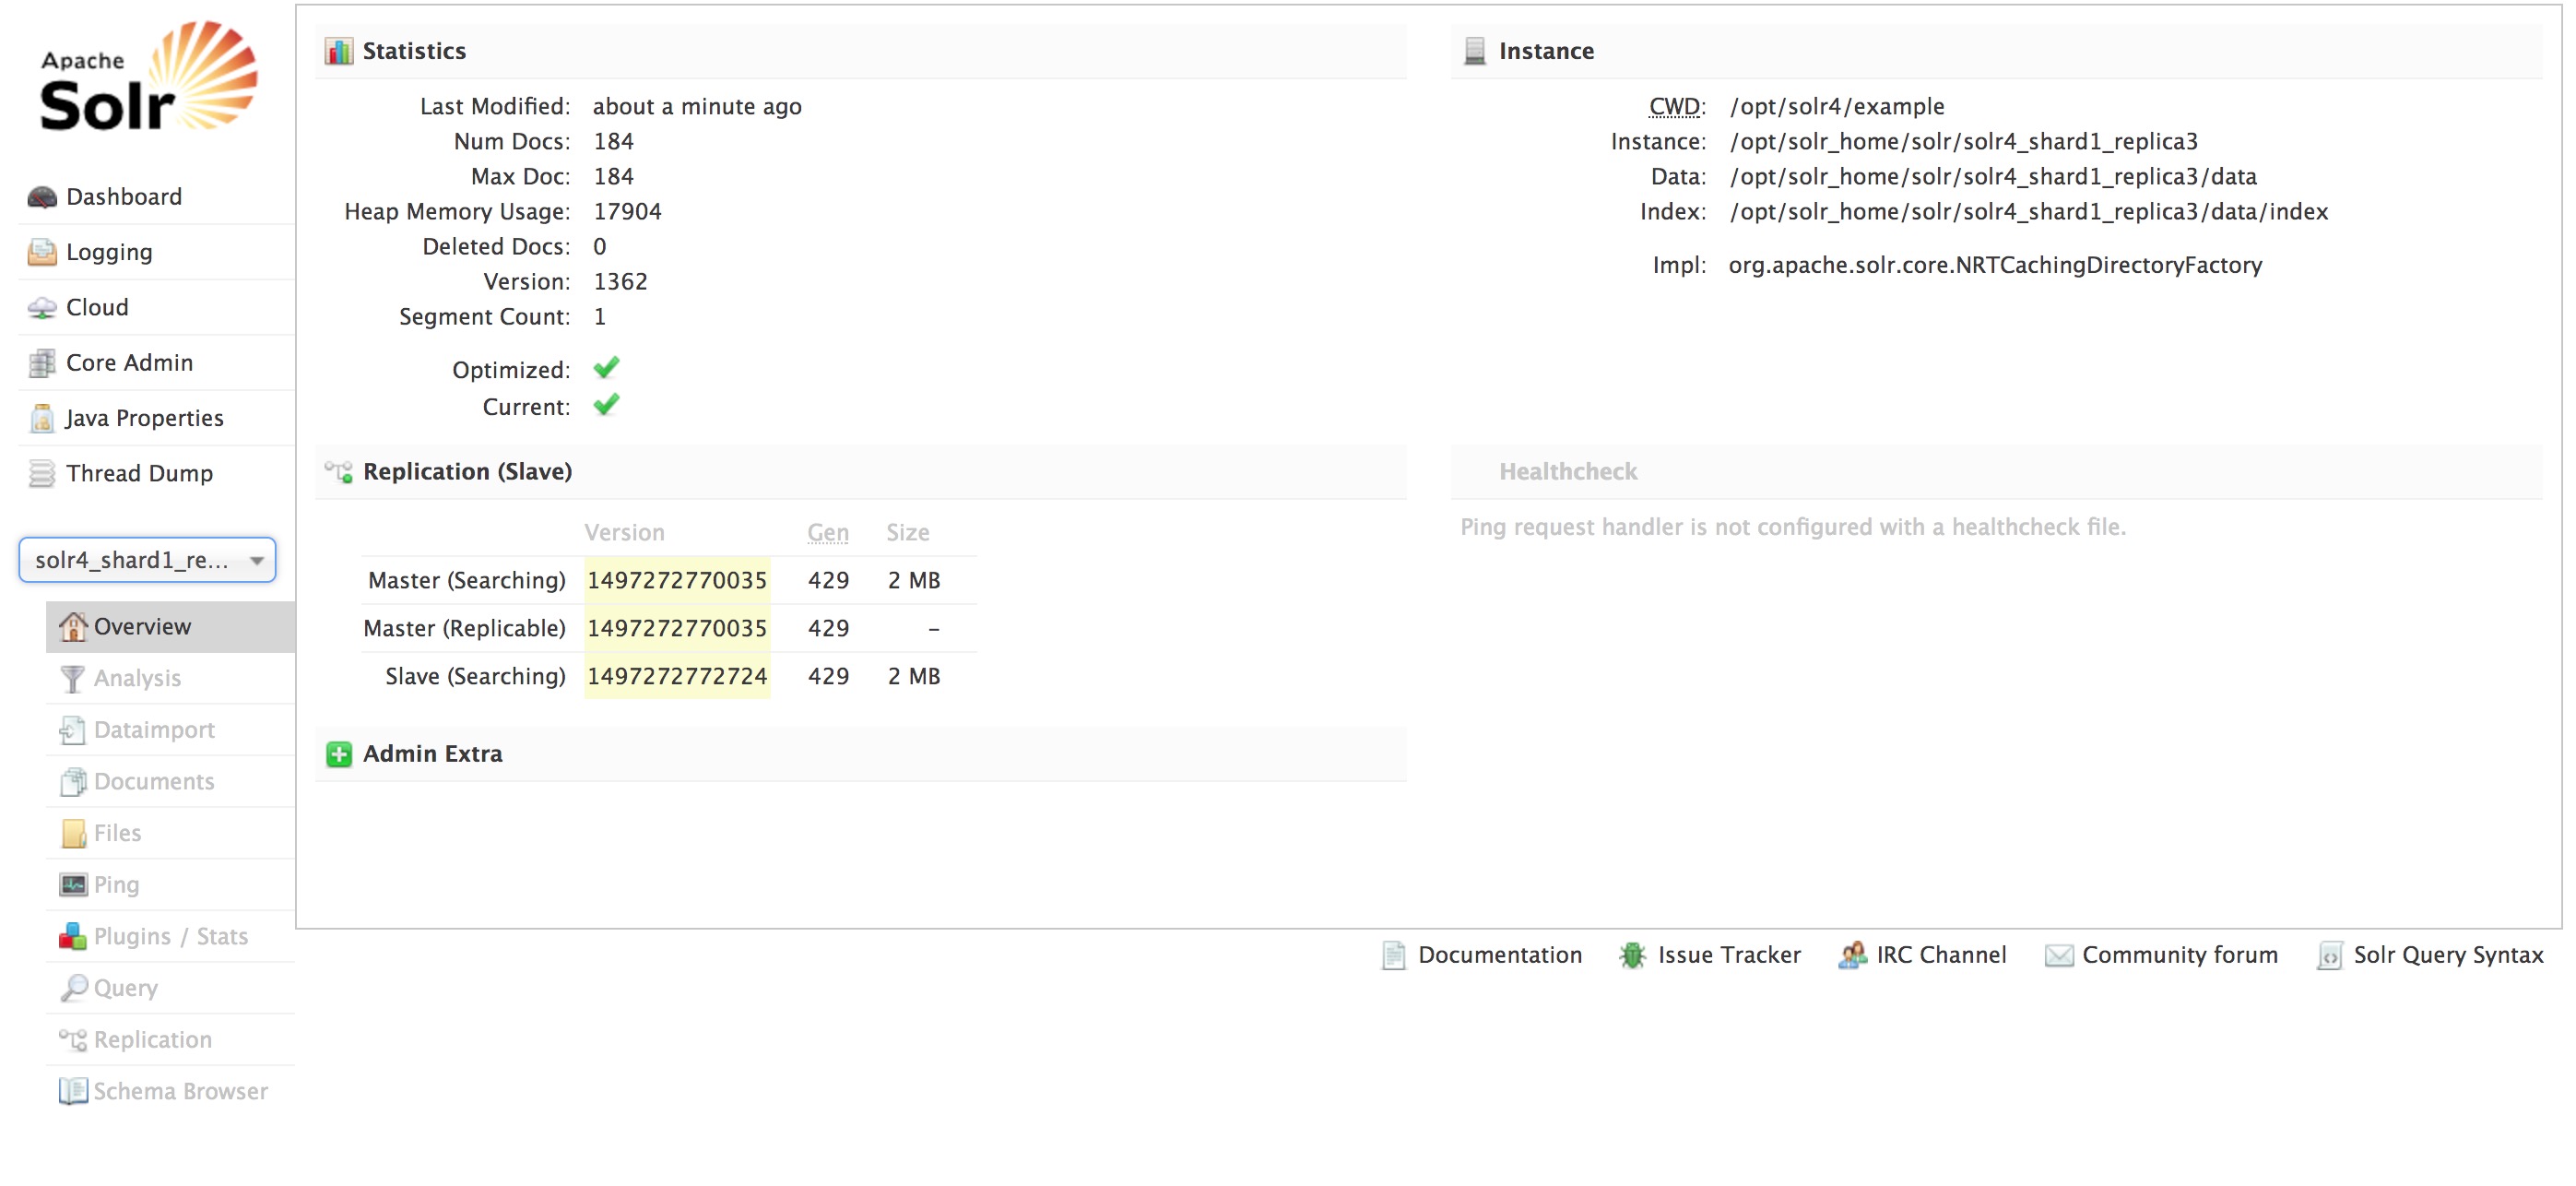
If you go to the Solr Admin UI, in the Cloud tab, you can see that your server has reached the existing SolrCloud cluster. The node may be in recovery mode for a short moment because it need to be synchronized with the leader to obtain the last version of the index.

We also see in the logging tab that we do not have any warnings or errors concerning the configuration files :

We need to do the same steps for the two other servers ie stop server 2, upgrade server 2, start server 2. And finally do the same thing for server 3 : stop server 3, upgrade server 3 and start server 3.
Once it is done, we need to update the luceneMatchVersion in solrconfig.xml in order to use the latest improvements, features of Solr. For now we have :
<luceneMatchVersion>4.6</luceneMatchVersion>
We need to update it to the current version of Solr that we use, ie 5.5.4.
So in the solrconfig.xml file located in /opt/solr4/example/solr/collection1/conf replace the line by :
<luceneMatchVersion>5.5.4</luceneMatchVersion>
And send the modified configuration and reload the collection.
cd /opt/solr/server/scripts/cloud-scripts
bash zkcli.sh -zkhost ec2-35-157-255-130.eu-central-1.compute.amazonaws.com:2181,ec2-52-58-184-173.eu-central-1.compute.amazonaws.com:2181,ec2-52-59-174-201.eu-central-1.compute.amazonaws.com:2181 -cmd upconfig -confdir /opt/solr4/example/solr/collection1/conf -confname confsolr4
http://35.157.255.130:8983/solr/admin/collections?action=RELOAD&name=solr4
We check in the logging tab that we do not have any warnings or errors related to that change.
OK so the first step is done. Our cluster is now fully upgraded to Solr 5. Let’s do the same thing for Solr 6 now.
2. Upgrade to Solr 6
The steps are very similar to the ones to Solr 5. It will be easier because Solr 6 uses the same installation script as Solr 5 and there is a tool included to easily upgrade to a new major version (i.e we keep the configuration files, the service, the solr home data directory etc…).
A.Optimize operation
The first step is as before, to optimize our index before upgrading the cluster to Solr 6.
So to do that, simply enter the optimize command on any server :
http://35.157.255.130:8983/solr/solr4/update?optimize=true
(you need to add some documents between this optimize operation and the previous one. Otherwise the optimize will not be done if there has been no change and you will keep the old Solr index format. And when you launch Solr 6, the replication will not be OK because the index format is too old).
If you do this with a large index, be patient, the operation can be very long.
At the end, you can check directly in the admin UI if the operation is done :
Now, we have to check the schema.xml and solrconfig.xml files
B. Do the requires changes into configuration files
We do not need to do any changes. All our configuration files are already fully compliant with Solr 6.
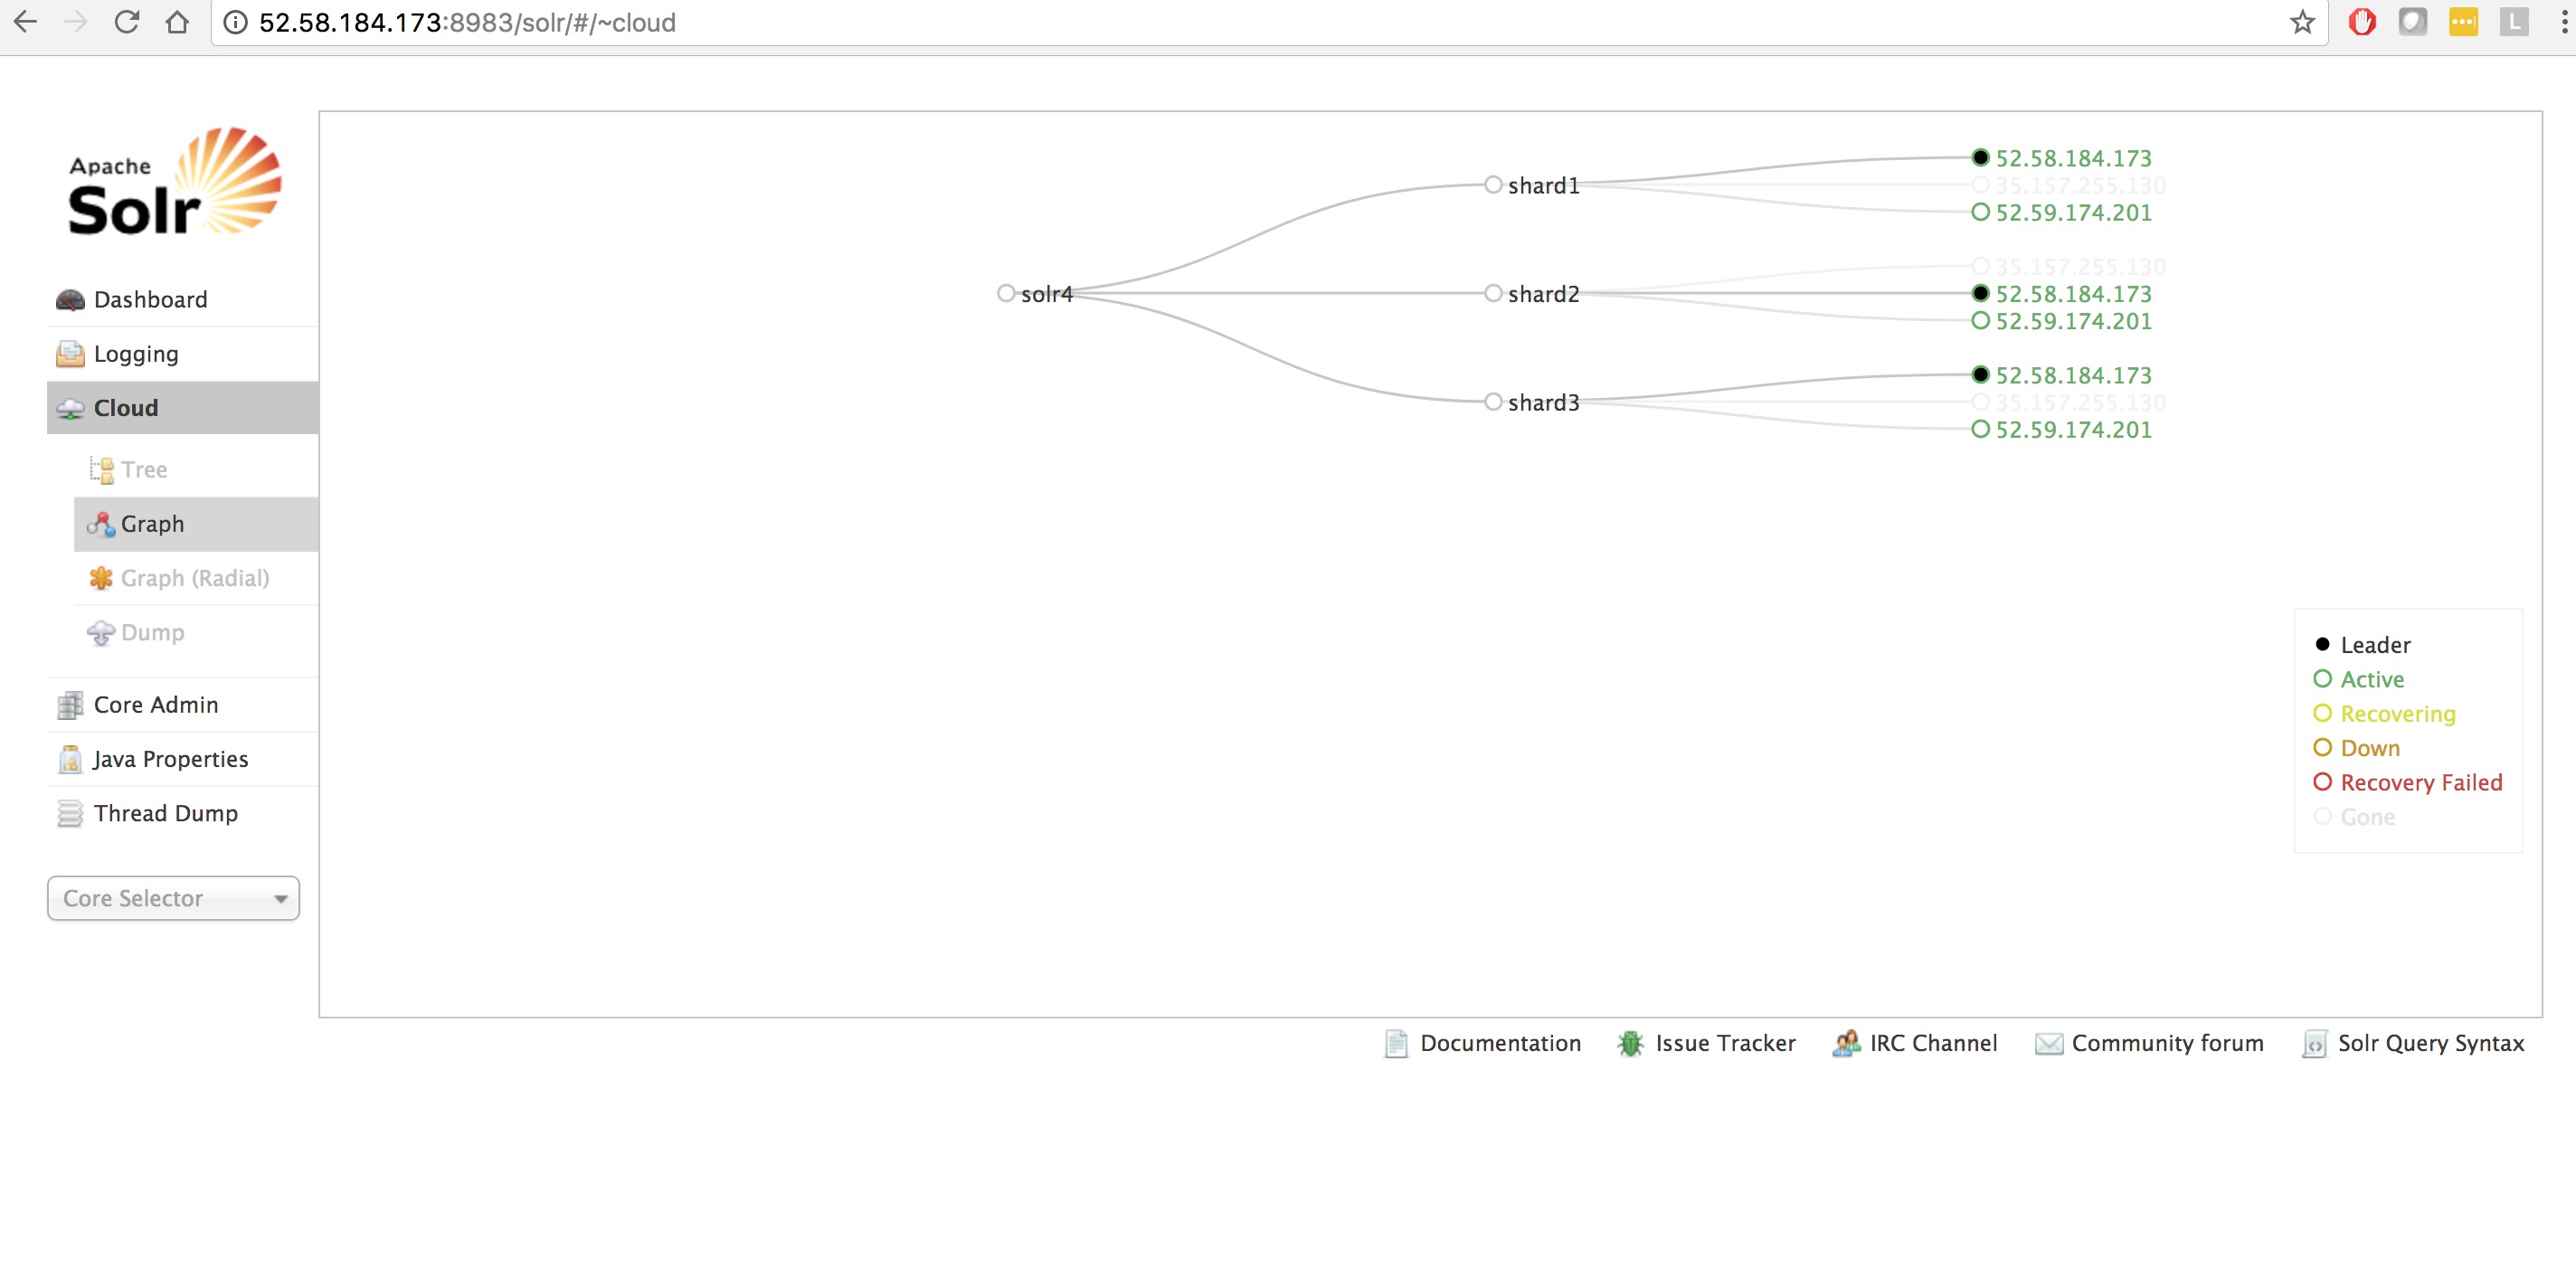
So now let’s install Solr 6 on every server one by one, like before.
So we begin by the server 35.157.255.130.
We stop Solr 5 on it :
service solr stop
You can check on the Solr UI that the leader of each shard is present on the other two servers.
After that we need to get Solr 6 from the official site and then install it with the production installation script. If you want more details about Solr 6 installation go here : https://www.francelabs.com/blog/tutorial-solrcloud-6-amazon-ec2/
Go to the solr6 folder unzipped and then in the bin folder :
cd /home/solr-6*/bin
bash install_solr_service.sh /home/admin/solr-6.6.0.tgz -f
Do not forget the -f parameter : we use it to indicate that this is an upgrade so Solr will do the upgrade automatically, update the symbolic link to the installation folder etc…
You can just connect to the admin UI and everything is OK !
As you can see it was very easy and fast.
Now just repeat the same operation for the other two servers.
Once it done, we need to update the luceneMatchVersion in solrconfig.xml located in /opt/solr/example/solr/collection1 in order to use the last improvements, features of Solr. For now we have :
<luceneMatchVersion>5.5.4</luceneMatchVersion>
We need to update it to the current version of Solr that we use, i.e 6.6.0.
So replace the line by :
<luceneMatchVersion>6.6.0</luceneMatchVersion>
And send the modified configuration and reload the collection.
bash zkcli.sh -zkhost ec2-35-157-255-130.eu-central-1.compute.amazonaws.com:2181,ec2-52-58-184-173.eu-central-1.compute.amazonaws.com:2181,ec2-52-59-174-201.eu-central-1.compute.amazonaws.com:2181 -cmd upconfig -confdir /opt/solr4/example/solr/collection1/conf -confname confsolr4
http://35.157.255.130:8983/solr/admin/collections?action=RELOAD&name=solr4
We check in the logging tab that we do not have any warnings or errors related to that change.
C. Final optimize operation
At the end, it is recommended to reindex the data on the new major version that was just installed or if you cannot, to do a final optimize operation.
http://35.157.255.130:8983/solr/solr4/update?optimize=true
This is the end of this tutorial. You have now a fully SolrCloud cluster with the last major version of Solr running without any downtime.
Please note that in this tutorial, we used the optimize operation to rebuild the index with the last index format version but you can also use the Lucene IndexUpgrader tool in order to do that : https://cwiki.apache.org/confluence/display/solr/IndexUpgrader+Tool